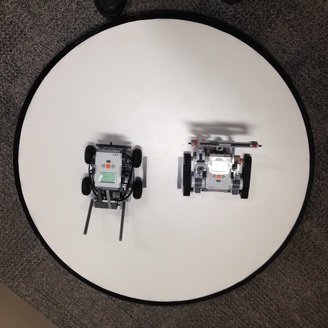
As we only had half the group here today (Gr6 were away at Outdoor School) we tried using a couple of EV3 kits to control directly for some Sumo challenges. Unfortunately we had bluetooth connection issues, so could only get one robot controlled at a time. Eventually realized how to connect both kits, but then we were out of time!
0 Comments
Today we were using the BeeBot coding App in Grade One. Students worked in co-operative pairs getting the BeeBot to the flowers. As an extension there was also a farm game where students had to herd sheep and chickens, which was quite challenging. Here's video that we showed at our STEAM Expo Assembly showing the 3D printing projects designed by Kindergarten and Grade 4. The next step is to identify 3D printing projects in other grades. Next year the Gade 1 classes want to design and print Christmas ornaments - great idea! The usual coding games that are my usual fallback for K - Gr4 are Botlogic, The Foos, Lightbot and Code.org, which are all free to use. I've recently discovered Runaway Robot, Barclays Code Playground and Code Monkey, as well as Rapid Router. The latter stands out for me (Code.org, too)as it also encompasses a layout builder so that students can develop their own challenges.
I'm keen to use the 3D printer with a whole class project. Next week I'd like to use it with the Gr4 classes making a bookmark. As they're going to be studying explorers I thought I could imprint a galleon shape using the hole function in TinkerCad, then the students could personalise their bookmarks. This seems like an intermediate step before they design their own products in TinkerCad. Here are some examples (note the bottom one was the first design where the galleon didn't imprint well!)
Here's a great example of Applied Design, skills & Technologies. Grade 6 students were studying electrical circuits by using Snap Circuits. As an extension their teacher got them to design bugs with glowing LED lights using clothes pins. (This project was adapted from Pinterest!) Here are some examples: Here are some of the photos from the Minecraft Photo Booth we set up yesterday. The reason for the different colours is that the camera is a Pi Noir camera, which has no infra red spectrum (meaning that it functions better at night.) As the students had played through the PlayPiper Minecraft scenarios I found a new activity, this time using a Raspberry Pi camera. It's a Minecraft Photobooth, linking both the virtual world of Minecraft with the real world. Unfortunately there seemed to be a couple of issues with the code, as the camera wasn't always triggered, and it seemed to be a just a one shot deal, ie. the python code needed to be run again after taking a photo. This needs some coding sleuthing!
We've been fortunate to have acquired a Tinkerine Ditto Pro 3D printer. Now the task is to learn how to use it, and then to develop student projects so that classes can use it effectively. Of course one issue is the long time it takes to print projects. I anticipate being able to print multiple prints in one pass, but time will still need to be taken into account. As far as software goes it seems that tinkercad.com is the most straightforward to use as a design platform. The only iPad software that I found very simple to use was Cubify Draw. Students in 45MacS made their names into 3D prints which proved easy to finish, each one taking about 20 minutes to print.
This is the first year that I've presented an e-safety message to the Kindergarten classes. I searched around and ended up finding this delightful, short video from Child Focus, Belgium. The only message I wanted the students to remember is that if they see something weird, then ask for help. The video was made in 2012, and presents a clear message. It would have been even more powerful if the genders were reversed, ie. a mother helping out her son! See what you think: |
AuthorAfter many years in the Archives
March 2018
Categories
All
RPK's del.icio.us links |